Survey Risk Register
Risk Register -- Creating, Viewing and Deleting
Overview
Users can add Risks to survey answers whenever applicable. These risks along with their details such as the name of the System it is applicable to, the severity of the risk and so forth are added to an overall risk register.
The risk register is used to monitor different risks affecting different systems within the business. The information obtained from the survey answers about various systems, processes, functions etc can be used to create an overall register of risks. With this register, monitored risks can dealt with based on their severity, type of impact, likelihood etc.
How to add a new Risk to the Risk Register
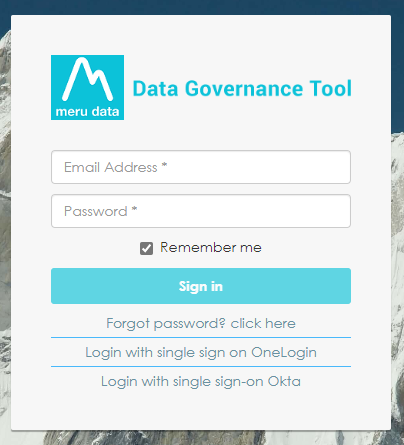
- Log in to your Data Governance Tool account.
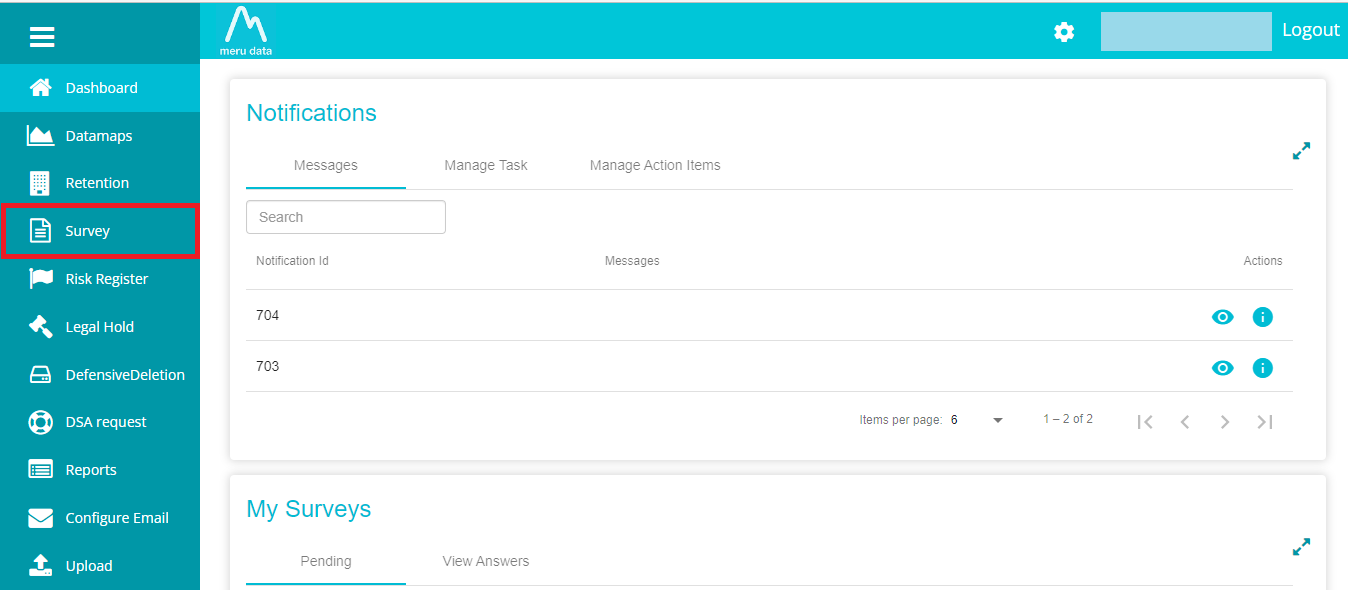
- From the hamburger menu present on the top left corner of the Dashboard, click on Survey.
- On the Survey page, disable the Distribution View or click on "Yes" in "Is Answered".
![]()

- Now, click the Analyse button against the survey whose answers with which you wish to create risks.

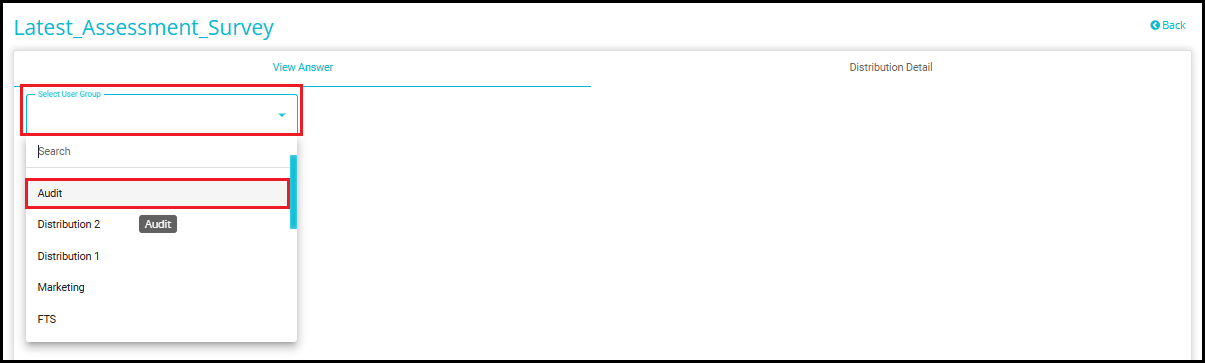
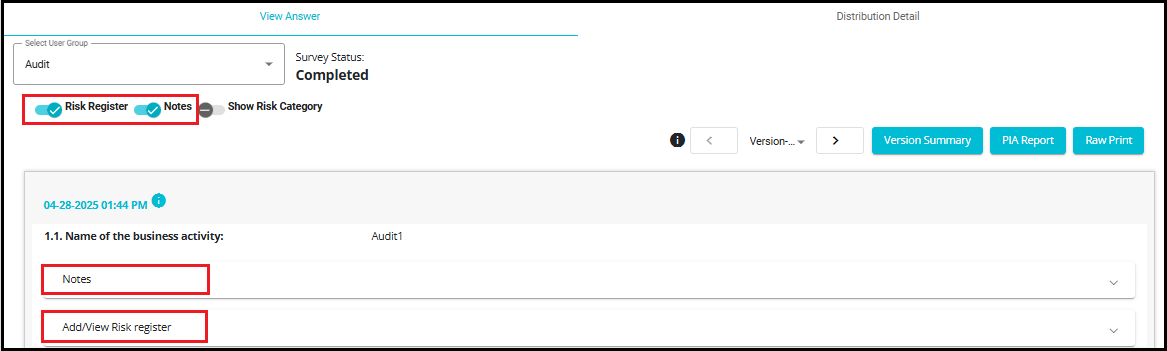
- On the View Answer tab, from the Select-User Group drop-down menu, select one of the user groups to whom the survey was distributed.
- Here you can view the answers of the survey along with associated systems and any notes or risks added to them. The risk category, which is configured based on the survey score can also be seen here on enabling the Show Risk Category toggle.

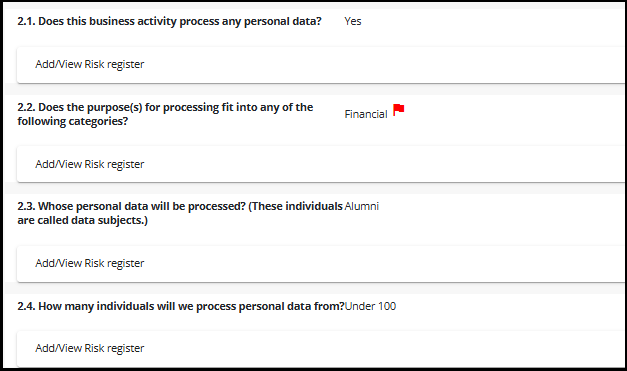
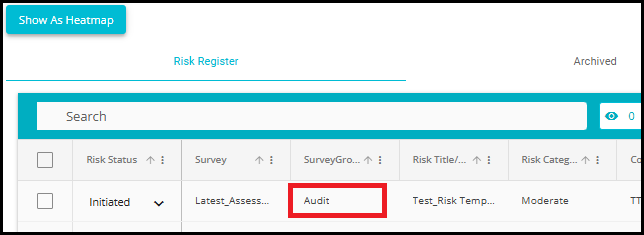
- Answers with Risks mapped to them will have a red flag present next to it as shown below.

- To create new Risks, click on the toggle next to Risk Register. To view/create Notes, click on the toggle next to Notes.
- Once Risk Register view has been enabled, you will be able to configure the risks that are mapped to the answers.
Note: User can decide whether to keep the toggles disabled or enabled even after refreshing the screen or navigating to other Pages.
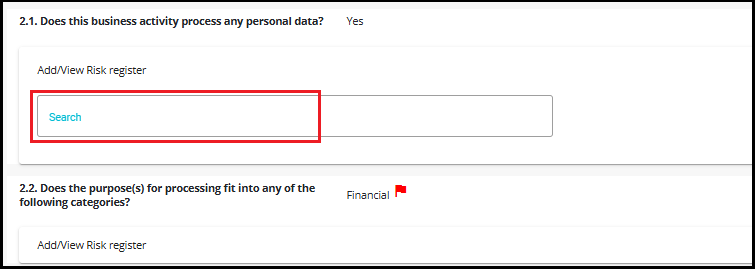
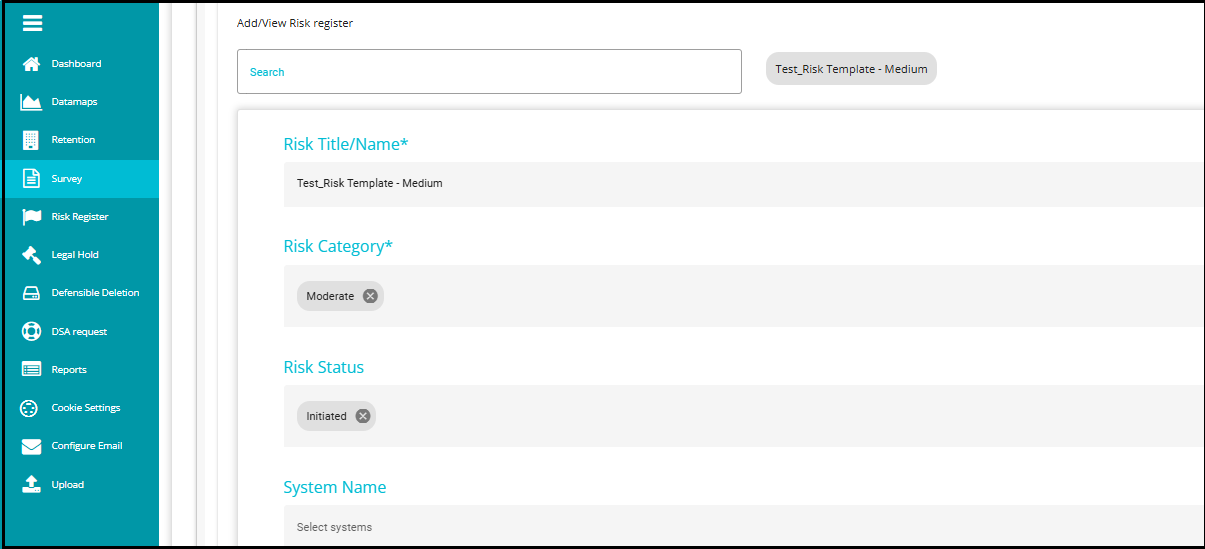
To add a new Risk, click on Add/View Risk Register.
Search: With this, you can name/select the code of the risk you are creating.
- You can either create a new risk by clicking +New or you can choose to add another iteration of an existing risk by choosing it from the drop-down.
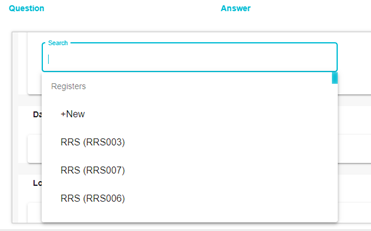
- Select +New to create a new risk altogether. The risk configuration tab will open.

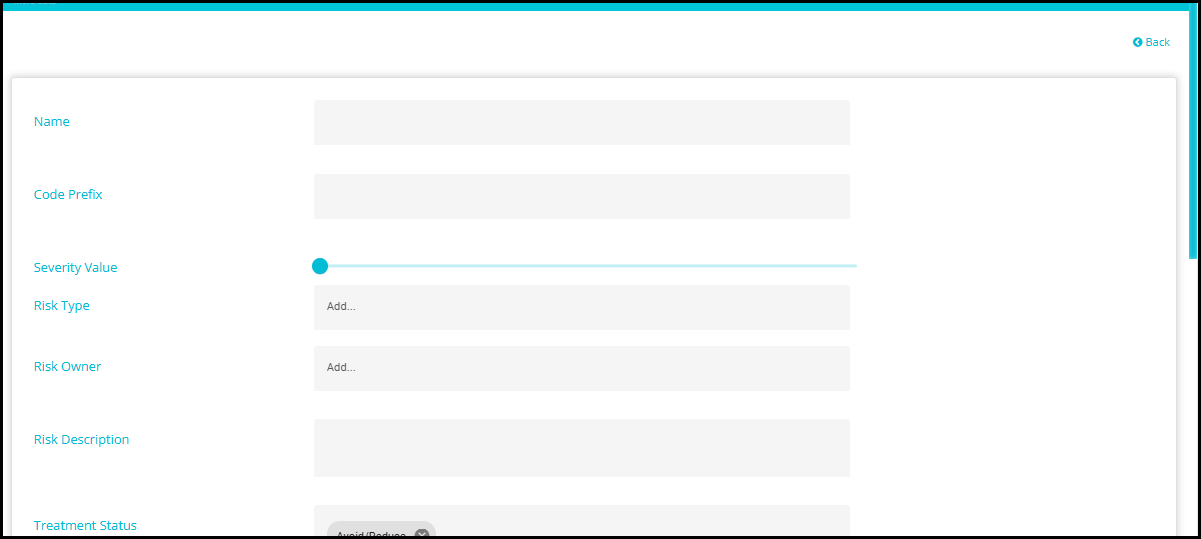
- Risk Title/Name: Type in a name for the Risk you are creating.

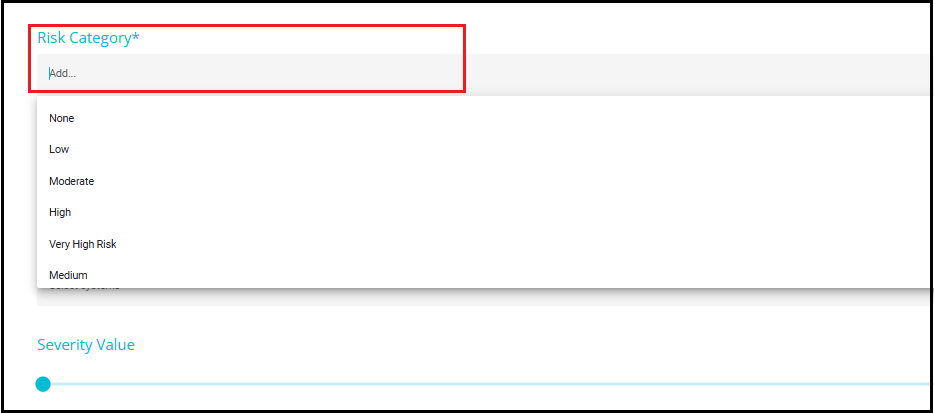
- Risk Category: This is used to classify the risk into a predefined or custom category (e.g., High, Low, Medium). Enables filtering and grouping of risks based on their nature.
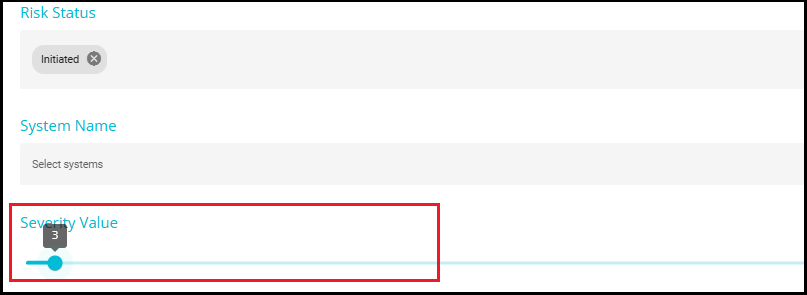
- Risk Status: Here you can update the status of the risk. After creation of the Risk Register, custom values can be entered for Risk Status to better reflect specific project stages or workflow requirements.

- System Name: From the drop-down, select the Systems to which you want the Risk mapped. The System on the drop-down menu will be the Systems associated with the Survey Group. In other words, you can only map the risk to Systems that were selected while creating the survey group.
The Risks mapped to Systems will be visible on the DataMap.
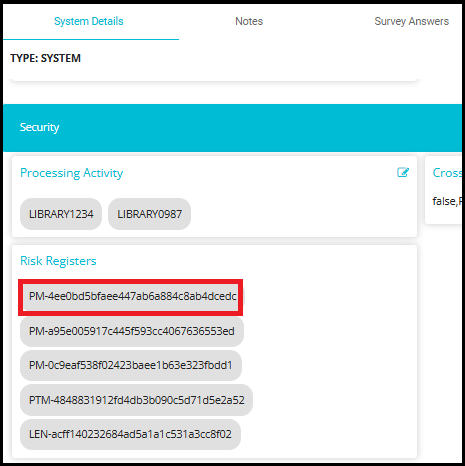
To view the Risks, go the System in question on the DataMaps module, on the System Details page, under the Tab -- Risk Mapping, the Risk Register Field will be available. Here you can view the risks mapped to this system.
DataMap > System Names > System > System Details > Security > Risk Registers. Click the Risk to view its details on the System Details page.
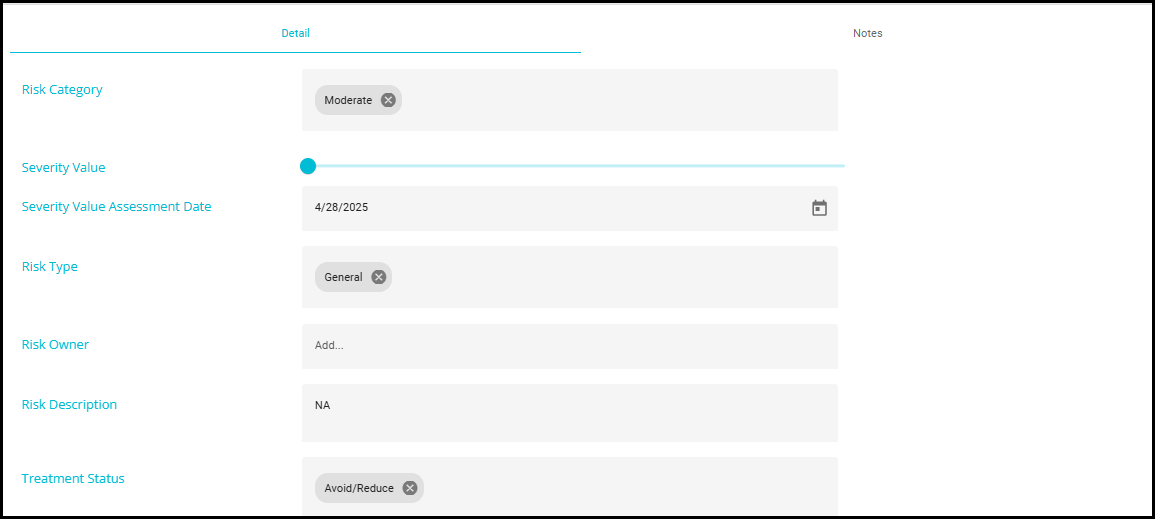
- Severity Value: Set the severity value of the risk. The higher the number, the more severe the risk.
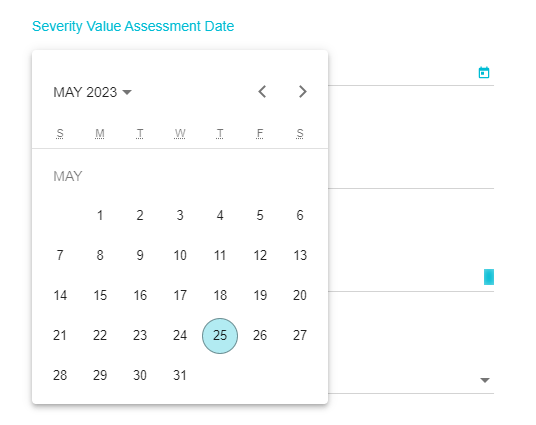
- Severity Value Assessment Date: Select the date on which the risk severity was assessed.
- Risk Type: From the drop-down users can select the nature of the risk from predefined options.
Additionally, users have the flexibility to add custom values to this field after the risk register is created, allowing for more tailored classification based on specific project or organizational needs.

Risk owner: Select a user to whom the risk is to be assigned.
Risk Description: Provide a brief about the details of the risk here.

- Treatment Status: Users can select a treatment status from the predefined dropdown options to indicate how the risk is being managed. Additionally, after the risk register is created, users can enter custom values for this field to better reflect unique or organization-specific treatment approaches.

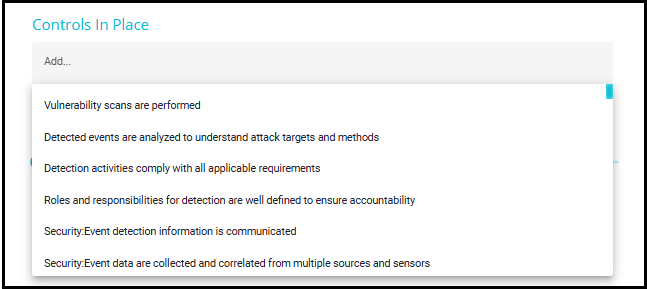
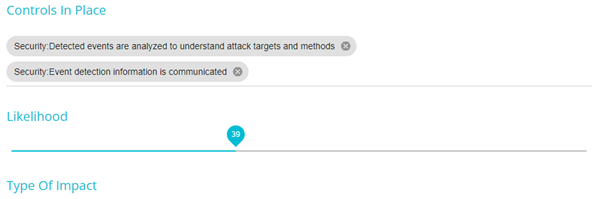
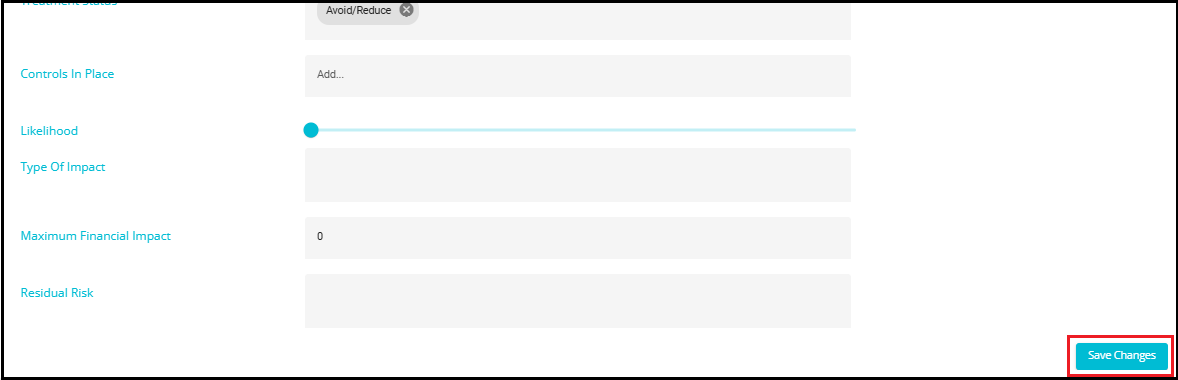
- Controls in place: Here you can enter the measures that are currently in place to combat/prevent such risks. Once a risk register is created, users can enter custom values to reflect the specific measures implemented.
- Likelihood: Set the likelihood of the risk occurring.
Type of Impact: Provide the type of impact anticipated due to the risk identified.
Maximum Financial Impact: Enter the expected financial impact of the risk.
Residual Risk: After assessing and applying controls to a risk, enter the estimated residual risk level (e.g., Low, Medium, High or a numerical score).

- Once the configuration has been completed, Click Save.

- Once the risk configuration has been saved, the following message will appear.

NOTE: After a risk register is created, users can enter custom values for the following fields:
Risk Status
Risk Type
Treatment Status
Risk Category
Controls in Place
Preservation of Custom Data on Cloning
When a risk register containing custom field values is cloned in the answer screen:
All custom data will be retained and displayed as-is.
This ensures consistency and avoids data loss during duplication.
Steps to View Risk Register and Configure Custom Risk Attributes
All risks created can be viewed and accessed from the Risk Register. The Risk Register provides a comprehensive view of all risks and their details in the form of a heatmap as well as in a tabular form.
- From the hamburger menu, click on Risk Register.
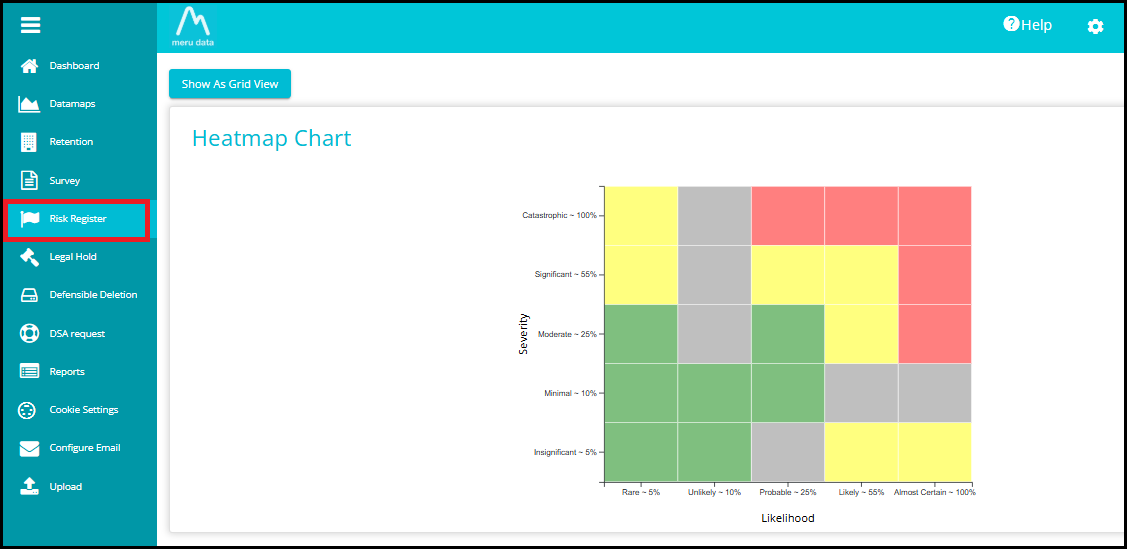
- By default, the Risk Register page will display the risks in the form of a Heatmap graph.
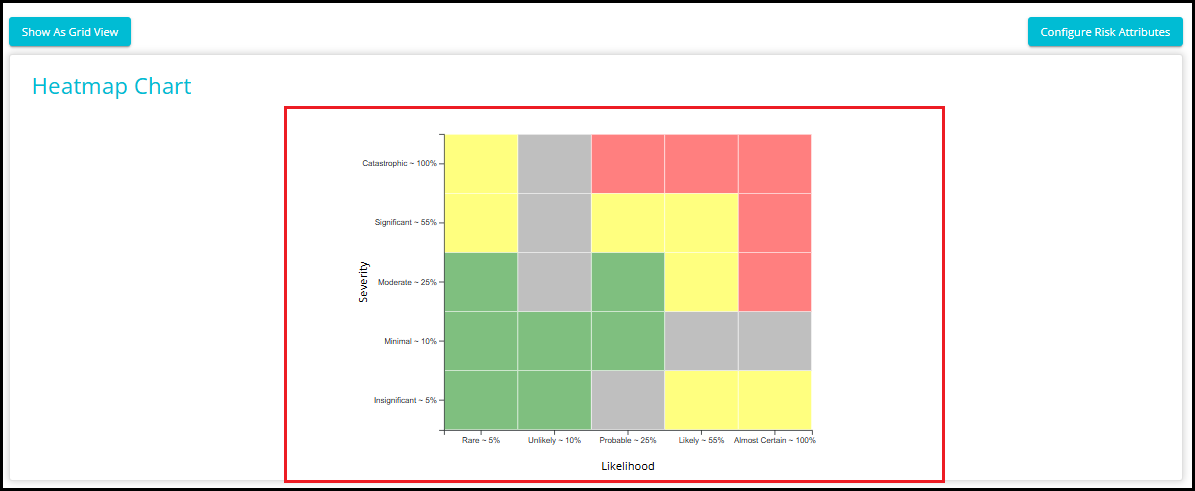
- Hover over the coloured blocks to see the risks included in that block. You can obtain the likelihood of the risk occurring and the severity of the risk by viewing this graph.
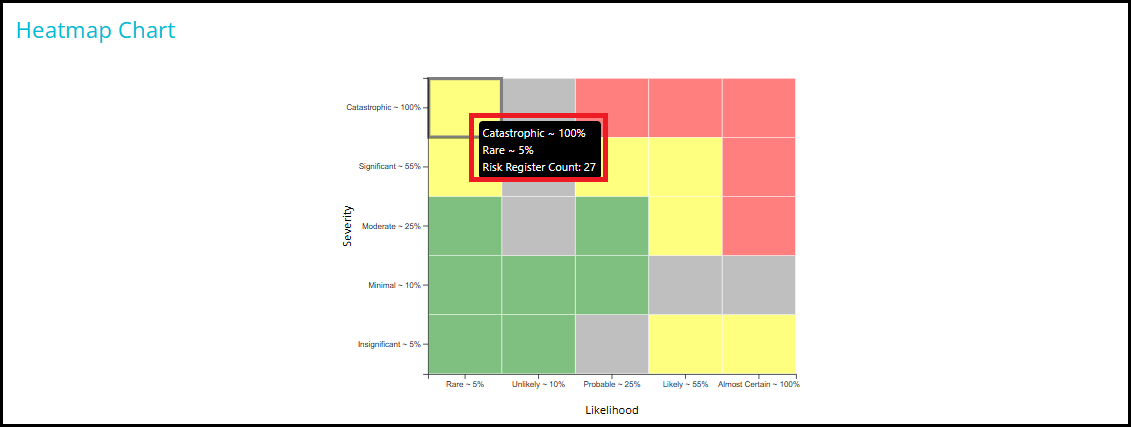
Colour Representation:
Red -- High Severity,
Yellow - Moderate,
Green -- Low Severity,
Grey -- None/ Not Mentioned.
Note: Clicking on any block will take you to the tabular view of the risks included in that block.
Configure Risk Attributes
- Click on "Configure Risk Attributes".
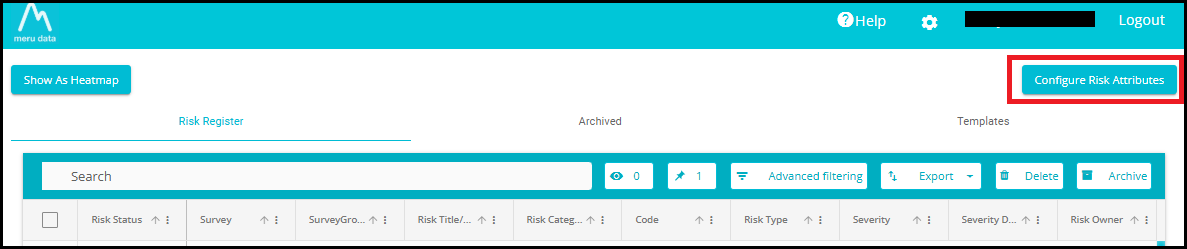
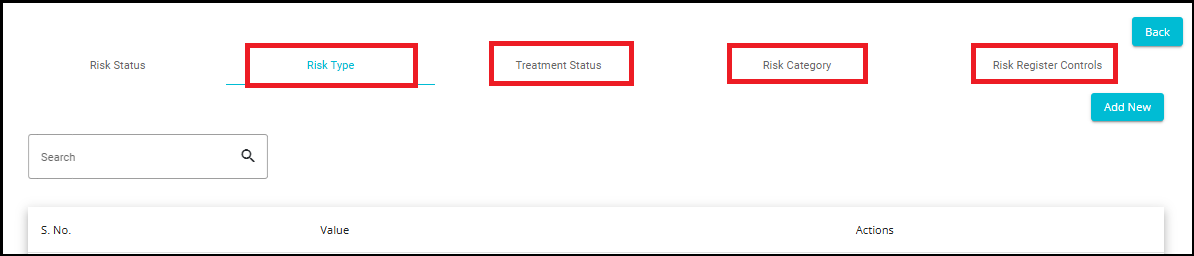
- You will be navigated to the configuration page, where you can add custom values to risk attributes such as: Risk Status, Risk Type, Treatment Status, Risk Category, and Risk Register Controls.
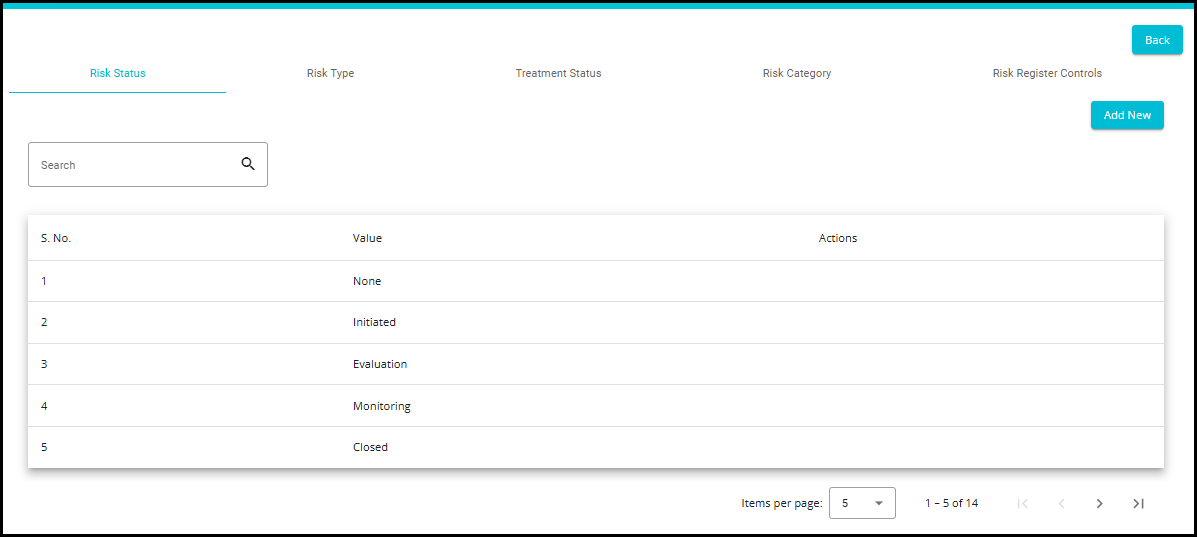
- Use the search bar to look for an existing value.

- If the expected value is not found, click the "Add New" button.
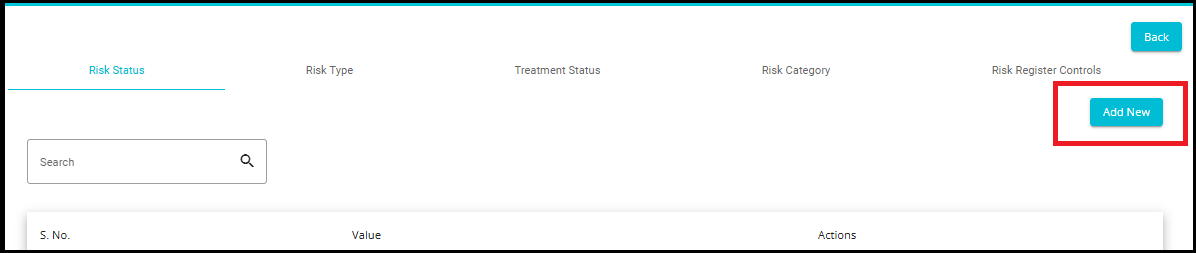
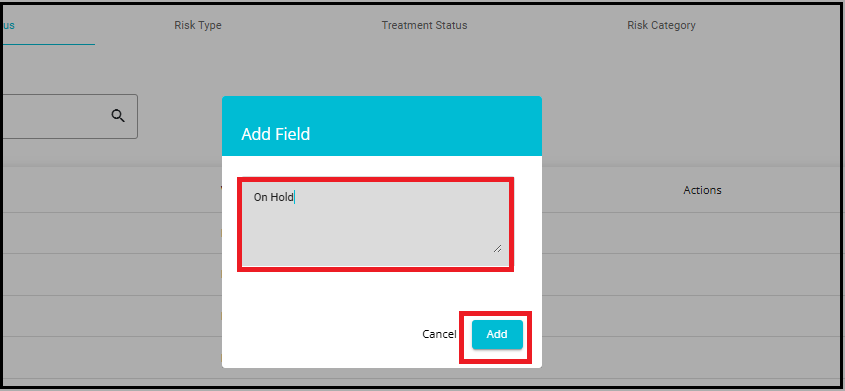
- A window will appear prompting you to enter a new value.
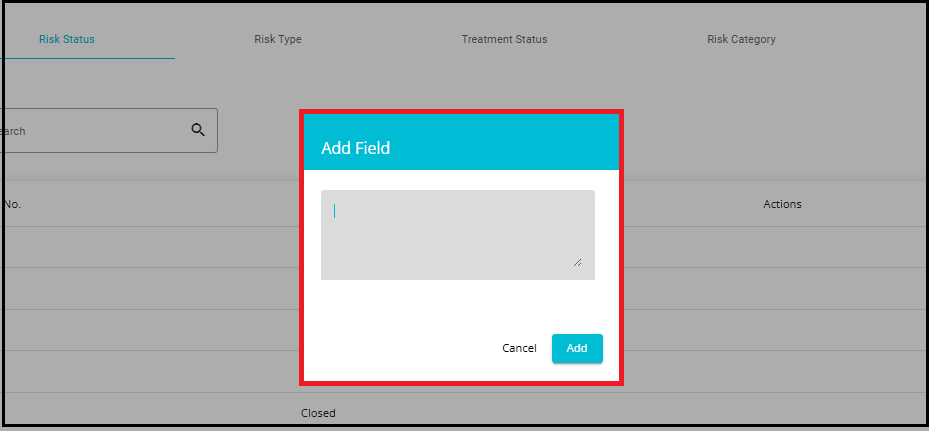
- After entering the value, click "Add" to include it in the list of existing values.
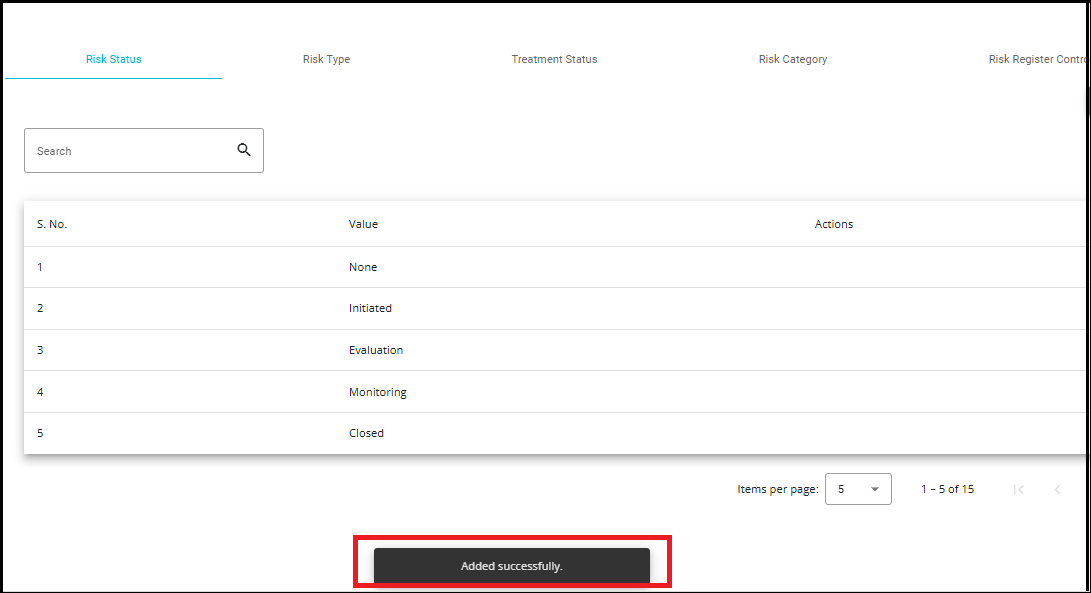
- After clicking the "Add" button, a confirmation message saying "Added Successfully" will appear.
- You can then use the search bar to find the newly added value, which will now be listed among the existing options.
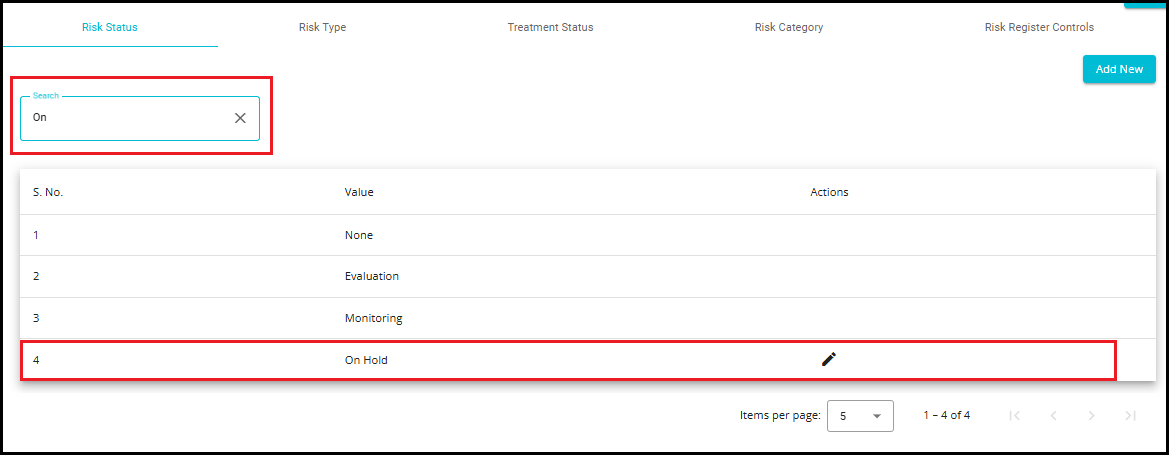
- To edit or update a value, click the edit icon located at the right corner of the respective field.
Note: The edit option is available only for custom values.

- A small window titled 'Edit Value' will appear, where you can modify the custom value.
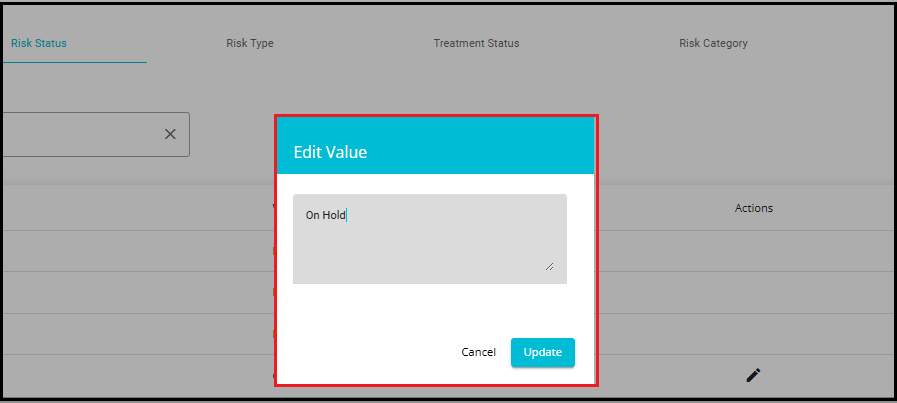
- After making changes, click 'Update' to save the changes.

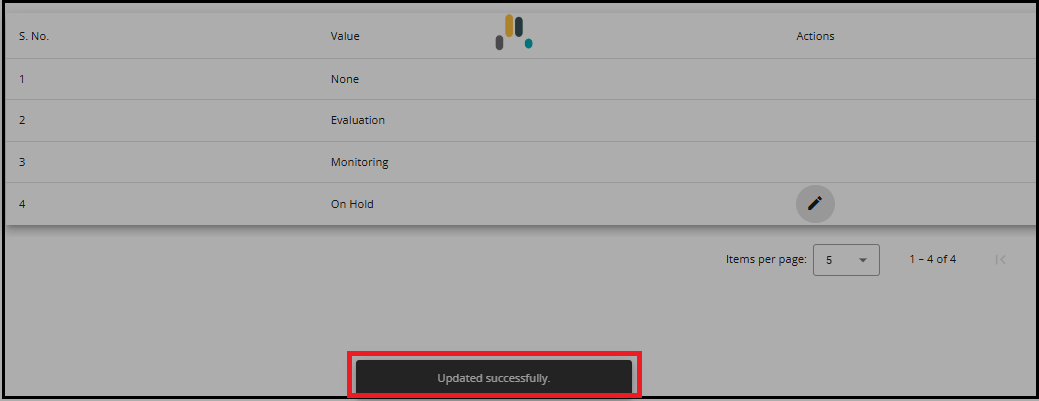
- After clicking the 'Update' button, a confirmation message saying 'Updated Successfully' will appear at the bottom of the page.
Note: If any existing values are updated, the changes will automatically reflect in all associated risk registers where the old value was used. The old value will be replaced with the new one across the system.
- If the user wants to enter custom values for other attributes like Risk Type, Treatment Status, Risk Category, and Risk Register Controls, the same process applies.
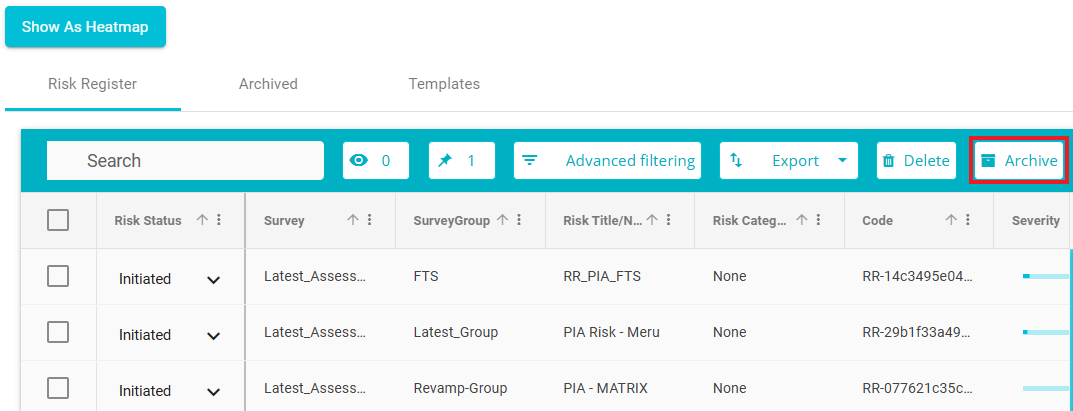
Grid View -- Risk Register
- Click on Show as Grid View to access the risks in a tabular form. Here you can view all the details of the risks such as their codes, owners etc.

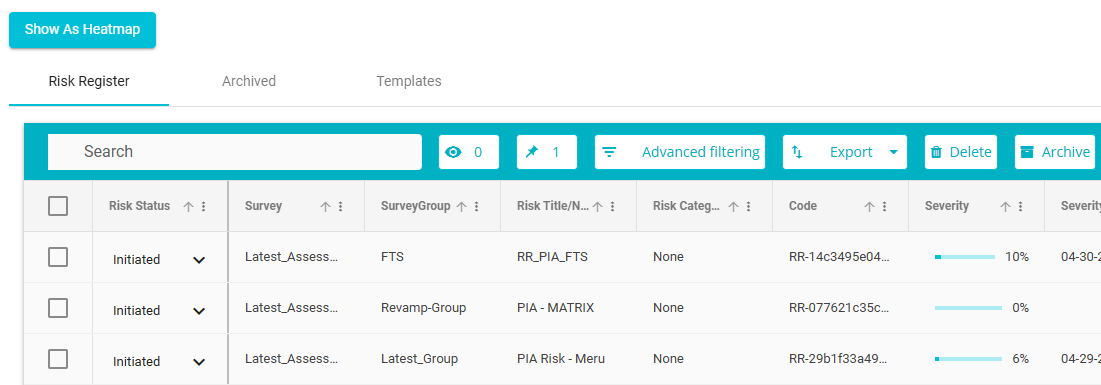
- Once a risk has been created, the Risk Status of that risk will automatically be displayed as Initiated. The status of the risk can be changed as required by selecting from the drop-down menu.
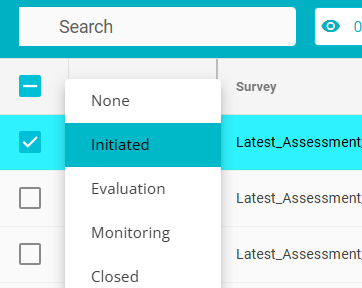
Note: If Closed is selected as the status of the risk, then that risk will be moved to the Archived table as the per the configuration set on the Delete Configuration page. In other words, if the configuration is set for 2 years, any risks with the status -- Closed, will be moved to the Archived table after 2 years from the date of closing.
- Click on risk register name to make modifications to it. Once you click on the risk, the following page will open from where you can edit/update the risk.
- Click Save Changes to update the edits to the risk.
- Risks can be deleted by clicking the Delete button on the top right corner.
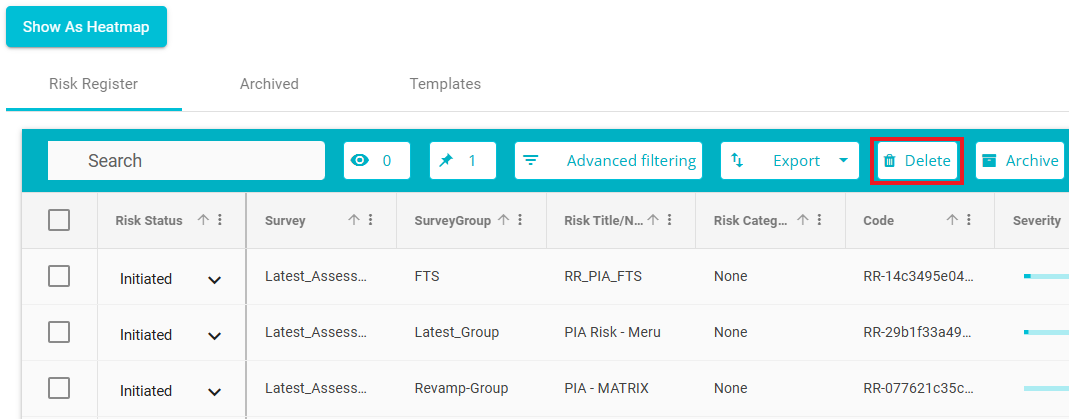
- User also can perform bulk delete by selecting the required Risks and clicking on delete button.

- Clicking on a survey group name will take you directly to the associated survey and open the corresponding risk register in the View Answer screen for detailed review.
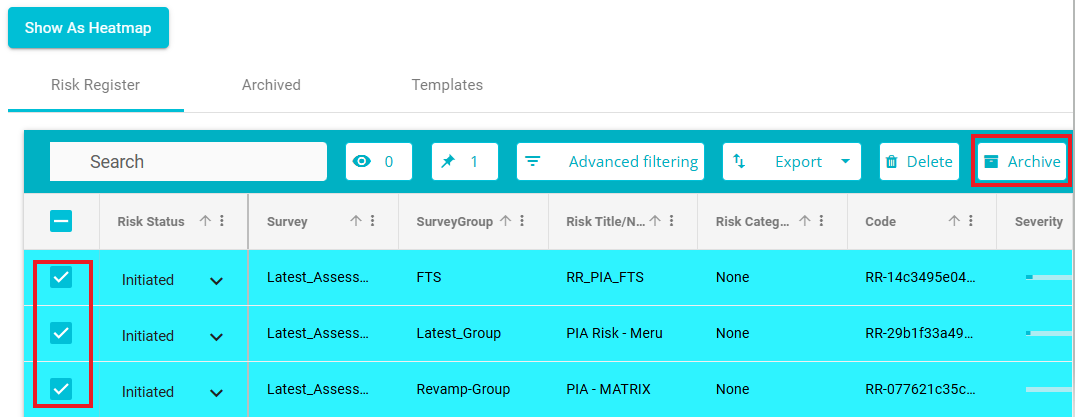
- Risks can be archived by clicking the Archive button on the top right corner.
- User also can perform bulk delete by selecting the required Risks and clicking on archive button.
Archived Risks
- Click on Archived to view the risks that have been archived. This can happen either by manually clicking the Archive button on the row of the risk or by setting the status of the risk to Closed. Depending on the configuration time, risks with the status Closed will automatically move to the Archived table.

- Here all the details of the archived risks will be visible, however no edits can be made to the risk from Archived table.
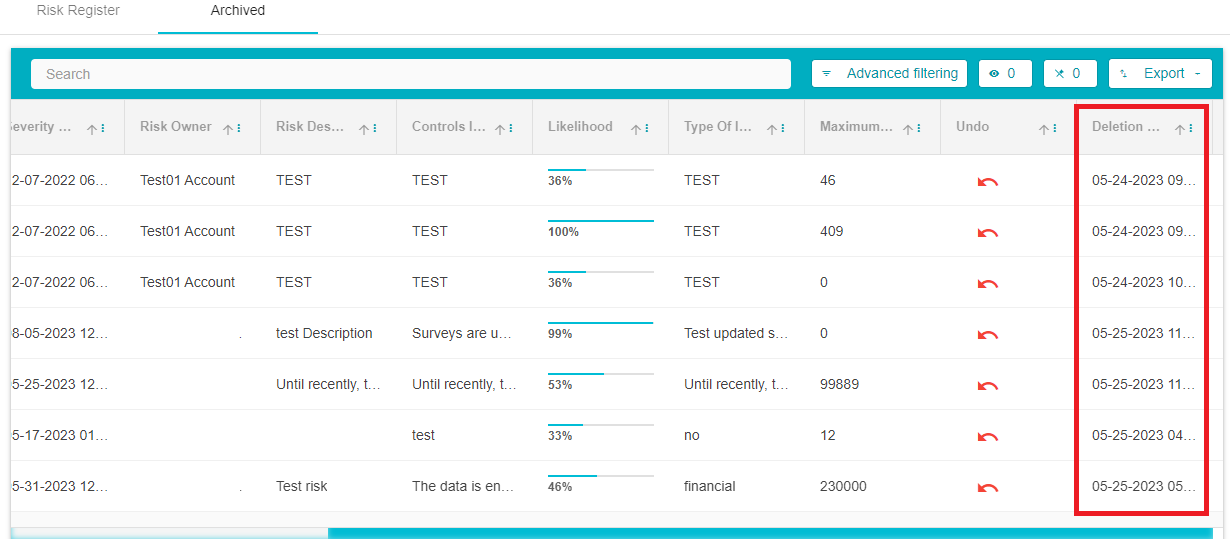
*Note: Risks from the Archived table will be permanently deleted after a certain period. This period is determined by the configuration made on the Delete Configuration page. If for example, the configuration is set to 3 years, then the archived risks will be deleted automatically after being present on the Archived table for 3 years.
- The configuration to delete depends on the Deletion Date of the risk. The Deletion Date is the date on which the risk was moved to the Archived table. The Deletion Date can be found by scrolling to the right of the Archived Table.
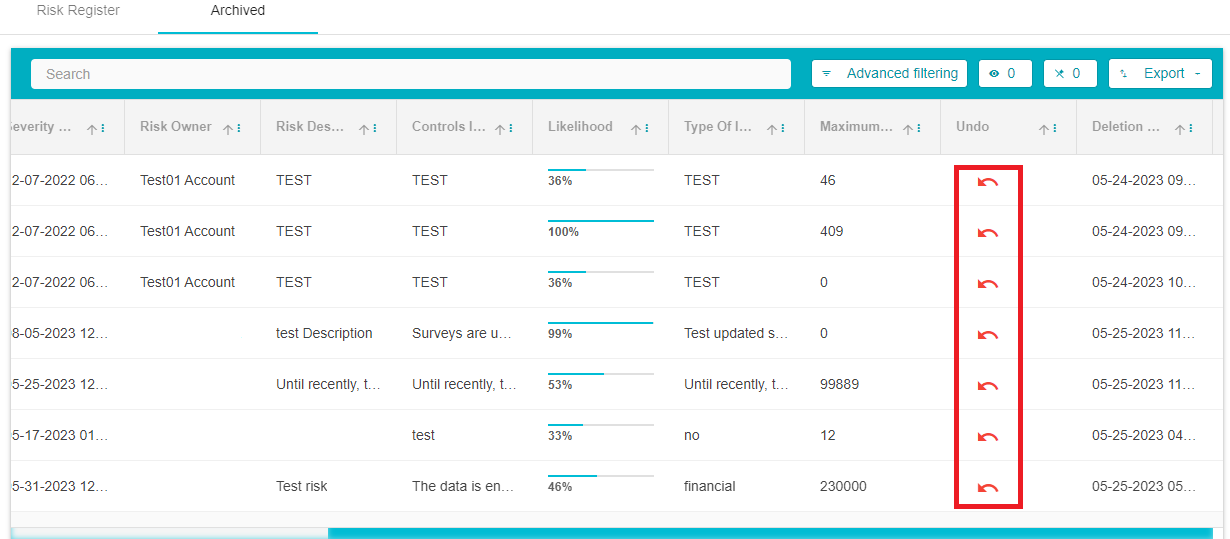
Risks can be made active again/ moved to the Risk Register table by clicking the Undo icon on the row of that risk. The Undo icon can be found by scrolling to the right of the Archived Table.
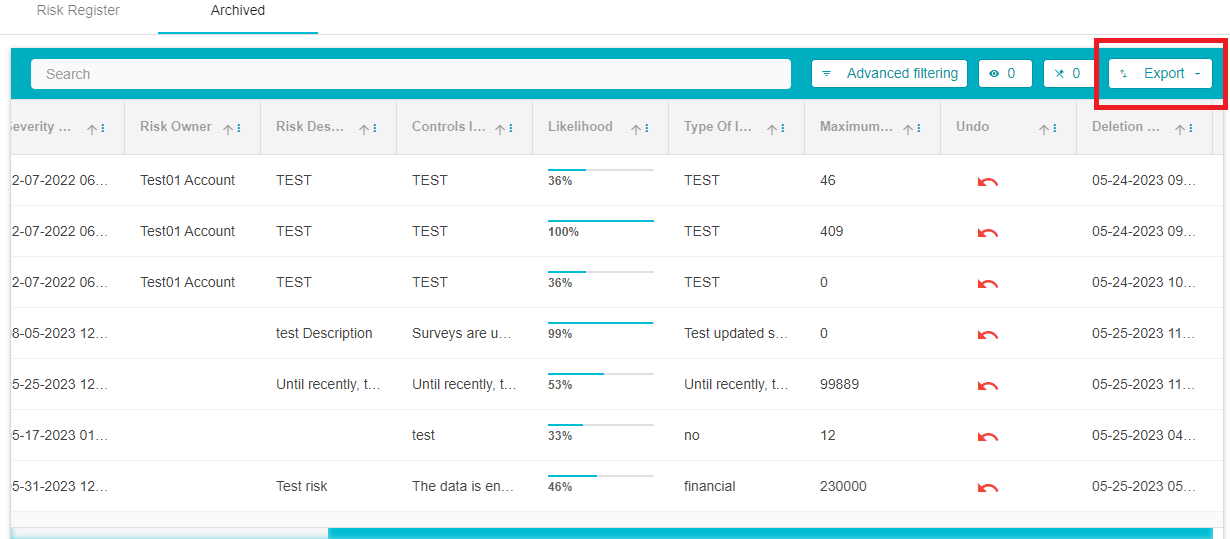
The contents of both tables -- Risk Register and Archived can be exported in an Excel or CSV format by clicking the Export button found at the top right of the table.
Templates
Risk templates can be created here. Depending on the survey answers received, these templates will be automatically appended to survey answers or shown as a suggestion based on the configuration made here.

To create a new template:
- Click on the Add Template button.
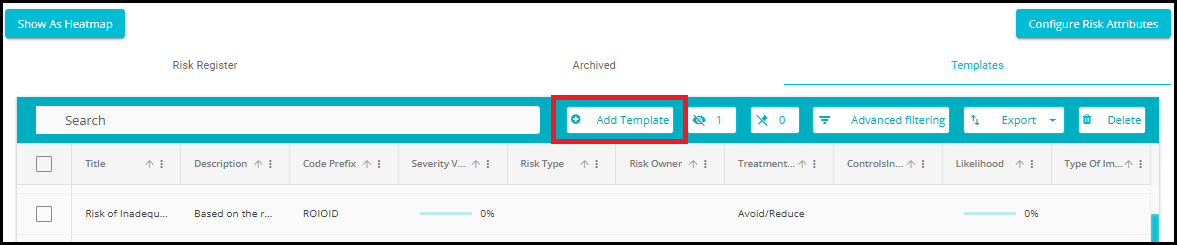
- The template configuration page will open.
Here you can configure the risk by adding the Name, Code, Risk Type, Treatment status etc as you did on the View Answers page.
Once the configuration is made, scroll down to the Automatic Add Criteria Section.
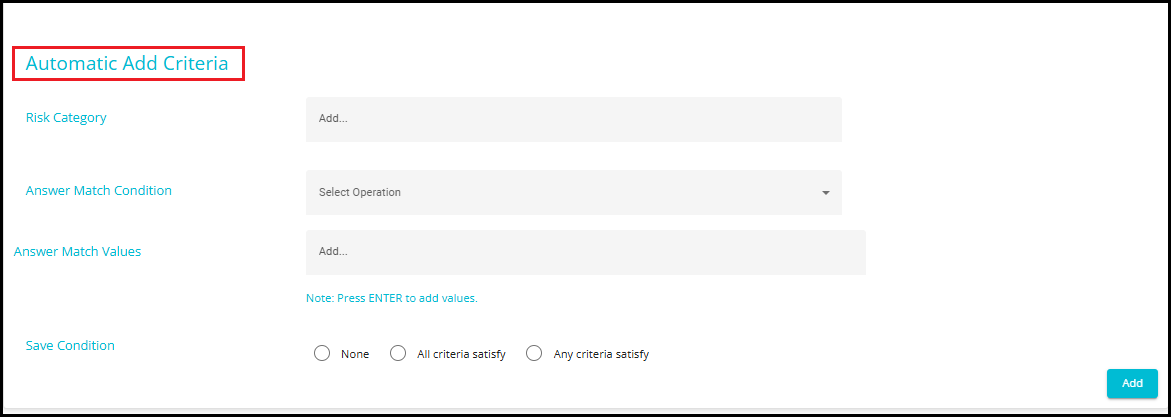
- Risk Category: The risk category is created based on the score calculated on the Survey Score Calculation page. The survey answer can be categorized as High, Moderate risk or Low risk.
In this field, select one of the above risk categories. On doing so, this risk template will be added to or shown as a suggested risk for the answers that with the risk category selected here.
Answer: Enter the value of an answer here. If the survey answer value matches the value entered here, then the risk template will be added to or shown as a suggested risk for that answer.
Answer Match Condition: From the drop-down, select the operation.

- Answer Match Values: Here, you can enter the Values and are required to press Enter to add.

- Save Condition: Here you can configure whether the risk template gets added automatically to the answers that satisfy the conditions above or whether they will be displayed as suggestions.
None: On clicking this option, the template gets saved and shown as a suggestion
All criteria satisfy: On clicking this option, the template gets saved and added to the answer automatically if all the answers are matched.
Any criteria satisfy: On clicking this option, the template gets added if any one of the criteria (Risk Category/Answer) matches the actual survey answer.
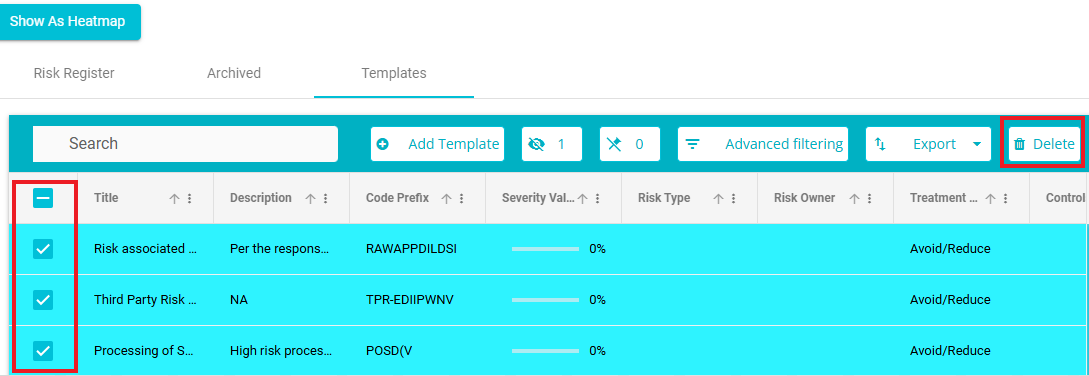
You can delete the Template by clicking on the Delete Button.
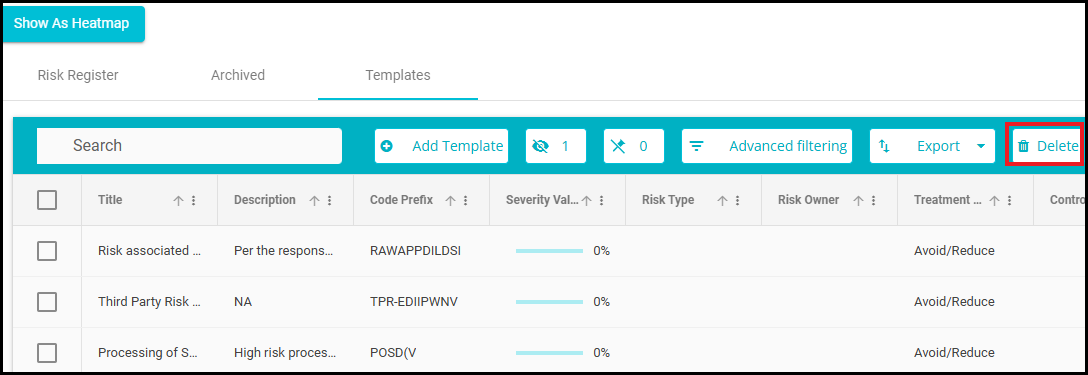
You can also perform bulk delete by selecting the required templates and clicking on delete button.
Delete Configuration
The Delete Configuration page is used for Risks under 2 situations
To determine when a risk marked as closed will move from the Risk Register Table to the Archived Table.
To determine when the risk present on the Archived table will be permanently deleted.
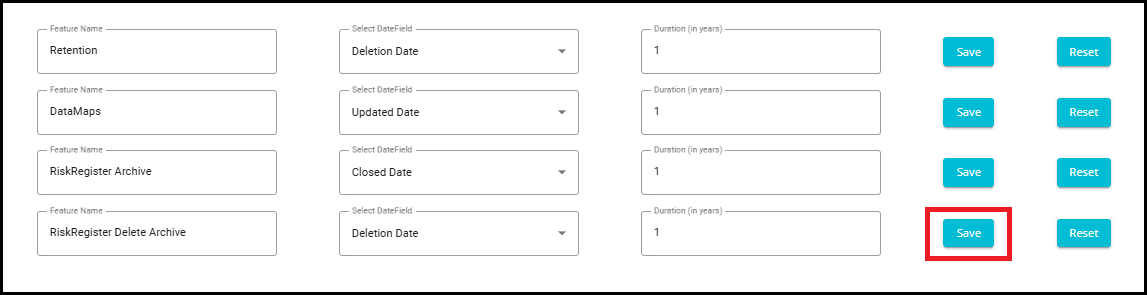
To set the Delete Configuration, follow these steps
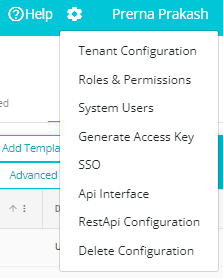
- Click on the Settings icon present on the top of any screen on Data Governance Tool.
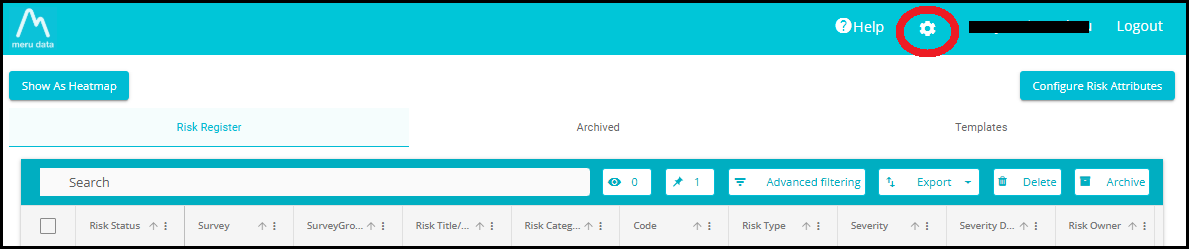
- From the Settings drop-down, select Delete Configuration.
- The Delete Configuration page will open.
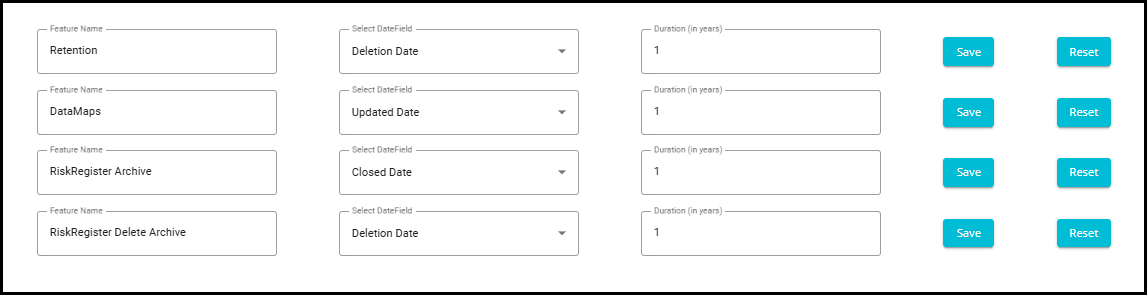
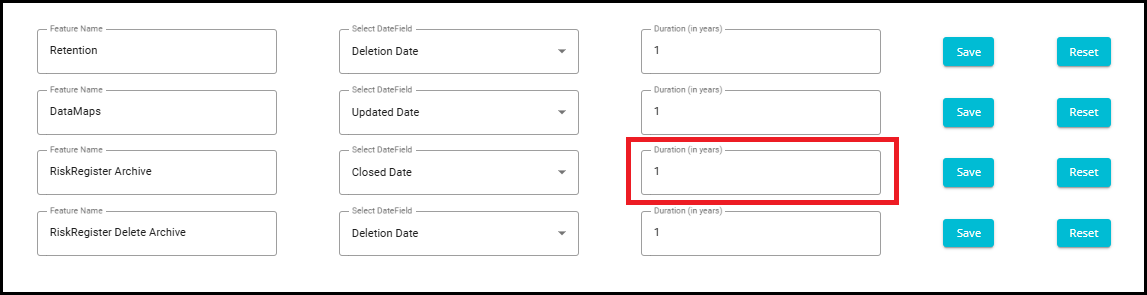
- Risk Register Archive: Here you can configure when the risks marked Closed (status set to Closed) will be moved to the Archived table. Type, in the Duration field, the number of years as per your requirement. If the number you typed in the Duration field is 1, then risks marked closed will move to the Archived table after 1 year from the date on which it was marked closed.
- Once the configuration has been made, Click the Save button against that configuration.
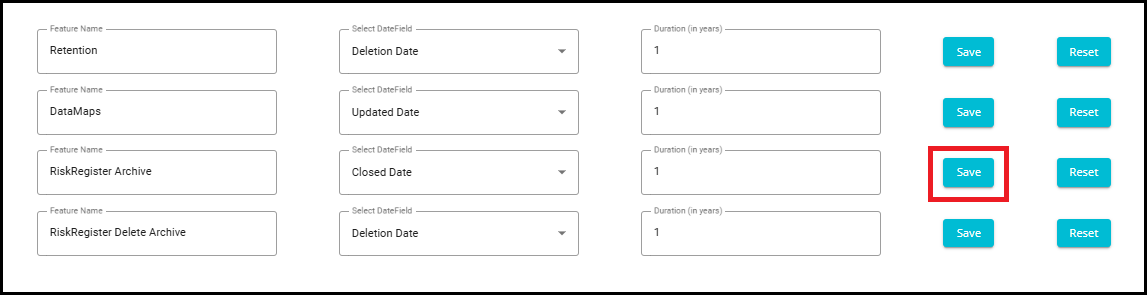
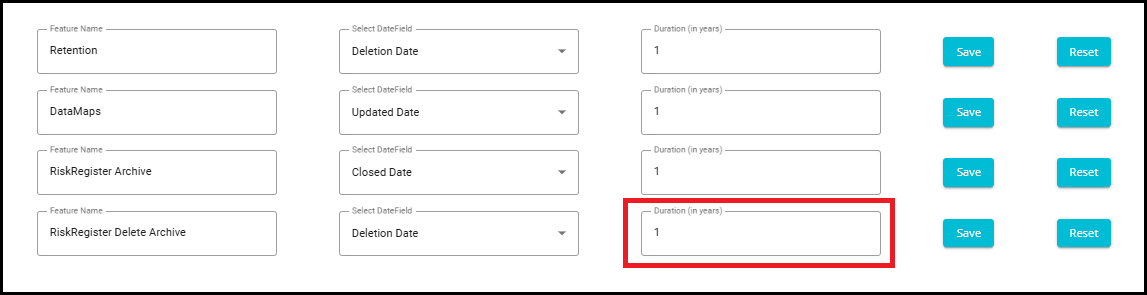
- Risk Register Delete Archive: Here you can configure when the risks present on the Archived table will be permanently deleted. The delete config duration will be counted from the Deletion Date. The Deletion Date is the date on which the risk was moved to the Archived table.
For example, If the number you typed in the Duration field is 1, then the risks on the Archived table will be permanently deleted after 1 year from the date on which it was moved to the Archive table.
- Once the configuration has been made, Click the Save button against that configuration.